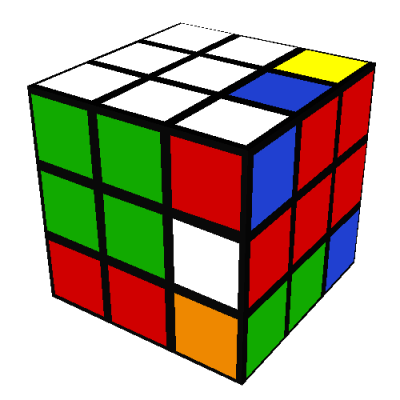
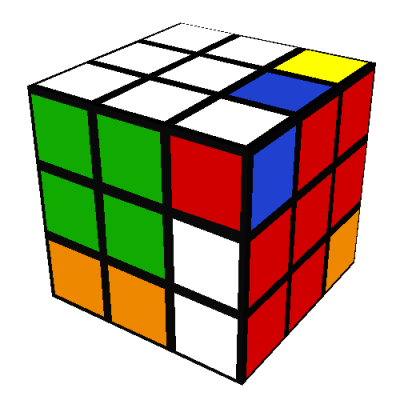
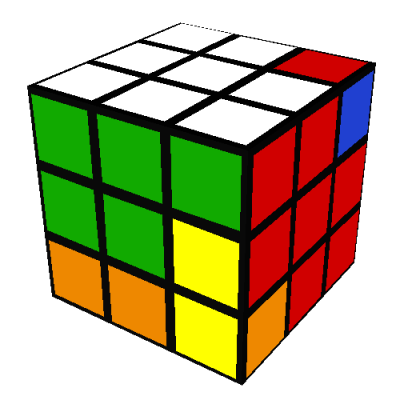
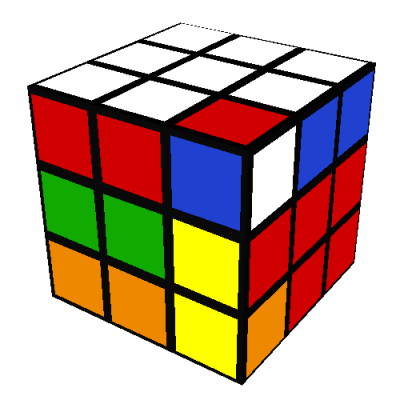
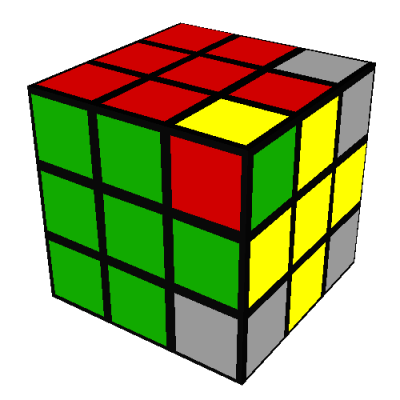
In 1980 my parents gave me an original Rubik's cube. I spent an entire weekend
(note 1) figuring out how to solve it, and the next couple
years refining and extending my algorithm for speed and flexibility. In the 1980s, cubes
were extremely popular (note 2): enough so that
people would frequently ask me to help them solve them, or teach them how to solve them on their
own. My final racing algorithm (note 3) was fast but
too complicated to easily learn.
I developed an entirely separate algorithm optimized for simplicity instead of speed. Teenaged twit
that I was (note 4), I called it "the stupid person's
algorithm" to distinguish it from my racing algorithm. I've long since forgotten the details of my
racing algorithm (note5), and must now use "the
stupid person's algorithm". A fitting consequence of my teenage hubris!
The algorithm is still quite simple and easy to learn (note
6). As cubes have come back into fashion I have decided to write it down for your amusement.
I will use the standard notation, which you can find described in detail
here. The 26
(note 7) sub-cubes that make up standard Rubik's cube may be
divided into three categories: centers, edges, and corners:
- First, there are six center pieces, each of which has only one color or face. The centers
can rotate freely, but never change positions relative to each other. In a standard cube, the
rotation of the centers is not visible; some cubes are made with photos or designs instead of solid
colors -- in these "logo" cubes, the rotation of the centers is important and requires additional
steps to get right. We'll cover that later -- for now, use a plain cube with solid colors on each
side.
- Second, there are twelve edge pieces, each of which has two colors or faces. Any edge
piece may reside in one of twenty-four orientations (twelve distinct positions, and two
orientations, or flips, in each position.) Because the centers never move relative to one another,
the final position of any edge piece can be determined without regard for any other piece: an edge
belongs in between the two centers that match the two colors on the edge.
- Third, there are eight corner pieces, each of which has three colors or faces. Any corner
piece may reside in one of twenty-four orientations (eight distinct positions, and three
orientations, or twists, in each position.) Because the centers never move relative to one another,
the final position of any corner piece can be determined without regard for any other piece: a
corner belongs in between the three centers that match the three colors on the edge.
In my illustrations, I use the
Western color scheme:
The up (U) side is white, the right (R) side is red, the front (F) side is green, the left (L) side
is orange, the back (B) side is blue, and the down (D) side is yellow
(note8).
As a visual aide, faces that aren't relevant to a given step in the algorithm may be shown in grey,
and faces that are relevant but unspecified may be shown in pink.
The algorithm has seven basic steps, which we'll cover in detail.
Top edges position and orientation
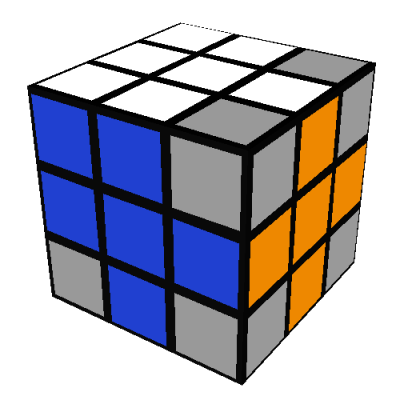
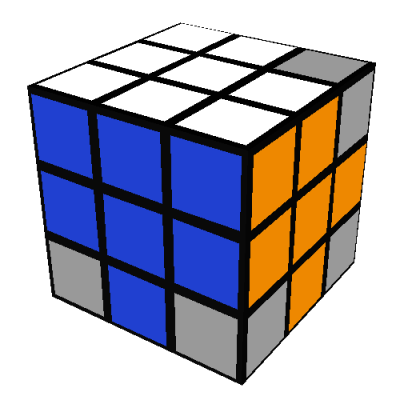
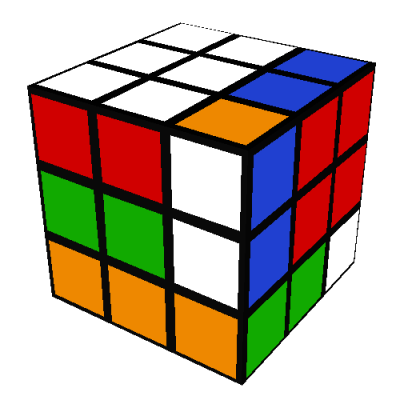
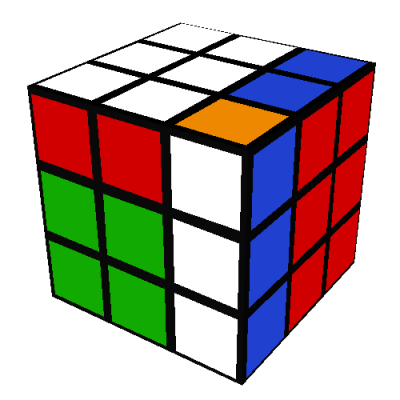
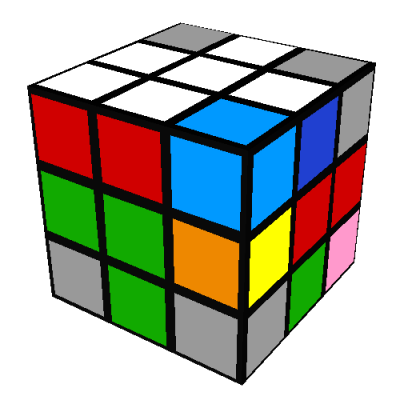
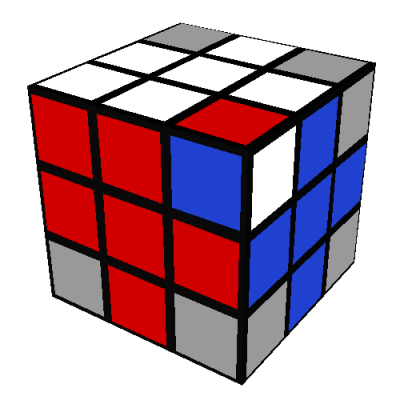
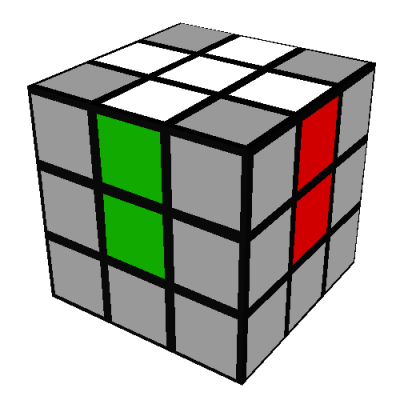
The first step is to correctly position the four U/white edges (white-green, white-red, white-blue, and
white-orange) so that they form a white-cross shape on the U/white side of the cube. When you are
finished, the front and back of the cube should look like this:
My algorithm doesn't give any explicit steps here; experiment until you can figure out how to get a
white cross like this on your own. If you need help, there is an excellent description
here.
Middle edges position and orientation
The next step is to get the four middle edges in their correct positions and orientations.
These edges are the ones that have neither white nor yellow faces. Let's do the green-red edge
first. There are four possibilities:
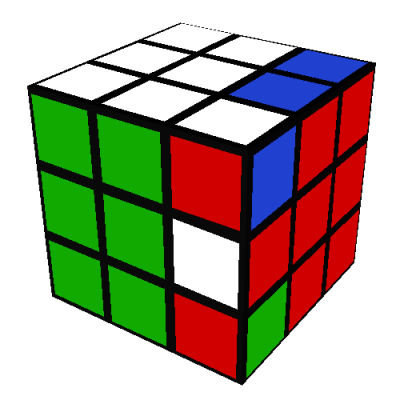
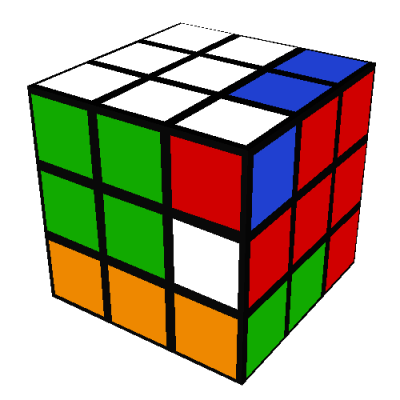
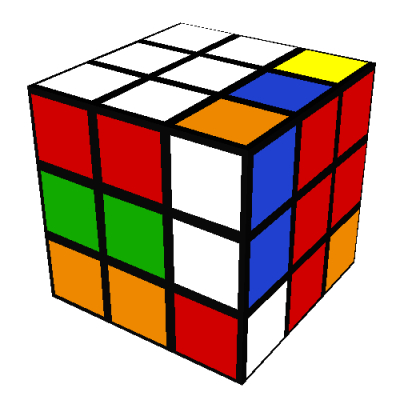
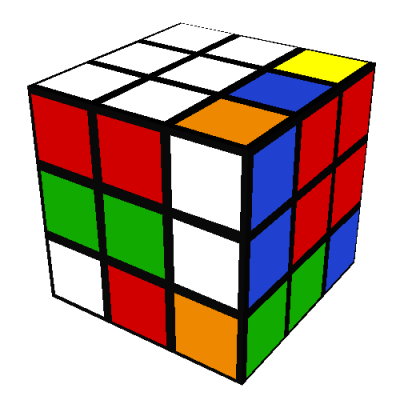
- The green face of the green-red edge is on the D/yellow side of the cube.
In this case, rotate the D/yellow side until its red edge is next to the red center:
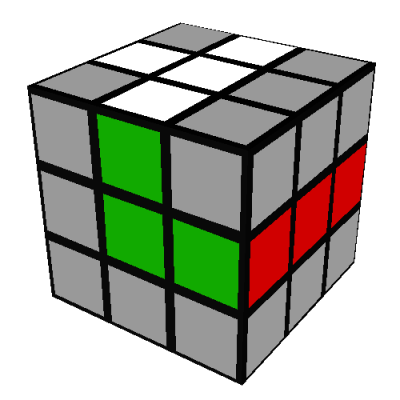
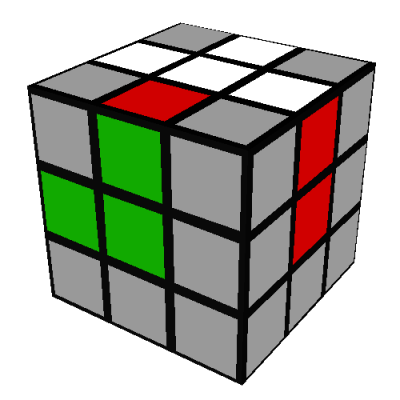
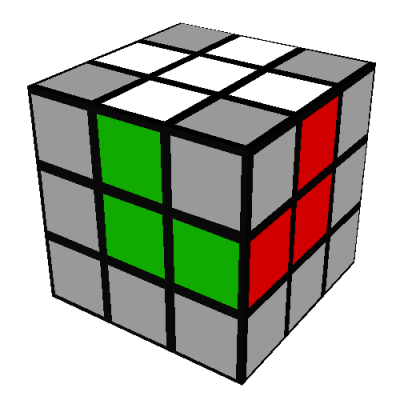
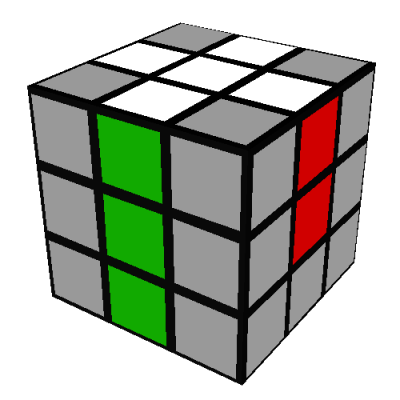
Then do the following sequence of four turns, RF'R'F:
This four turn sequence has moved the green-red edge into its correct position and orientation
without disturbing any of the other white or middle edges.
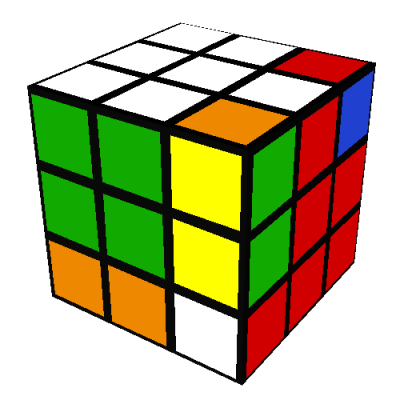
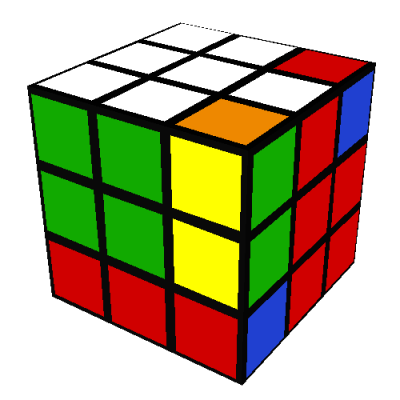
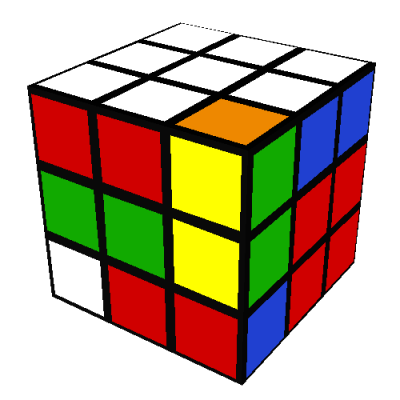
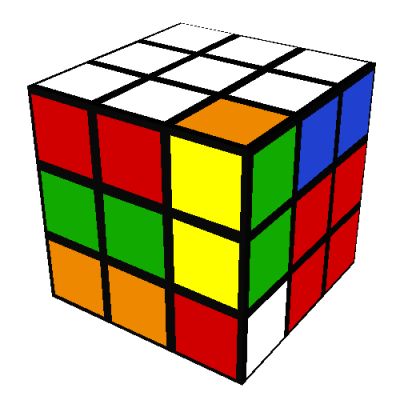
- The red face of the green-red edge is on the D/yellow side of the cube.
In this case, rotate the D/yellow side until its green edge is next to the green center:
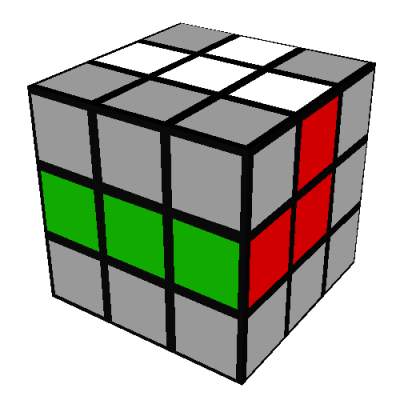
Then do the "mirror-image" four turn sequence F'RFR':
This four turn sequence puts the green-red edge into its correct position and orientation
without disturbing any of the other white or middle edges.
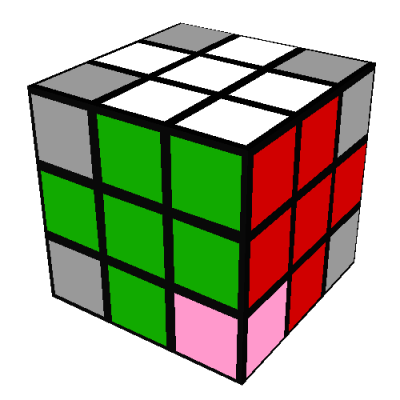
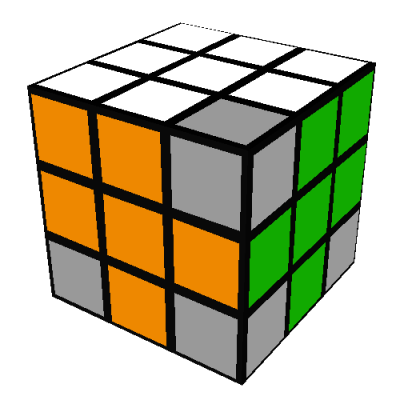
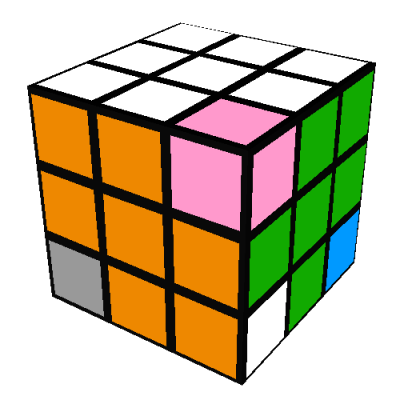
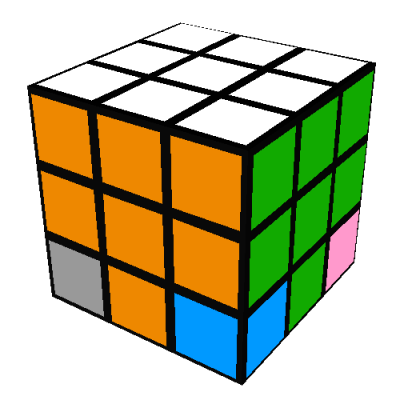
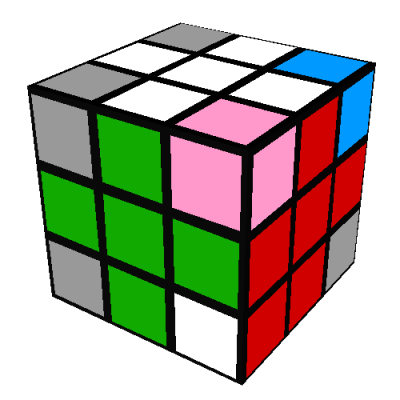
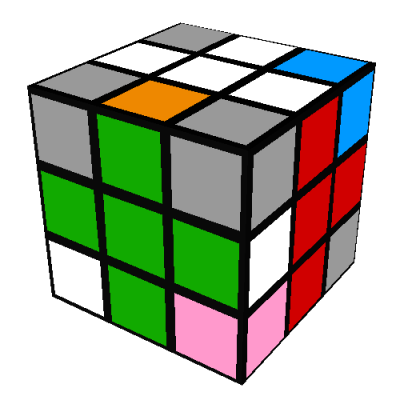
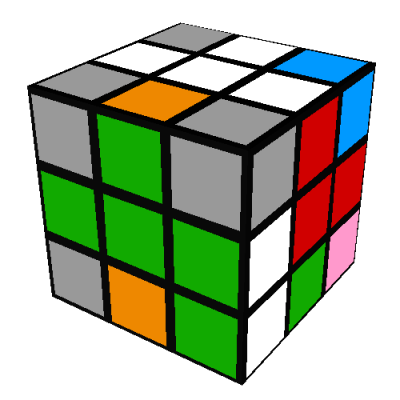
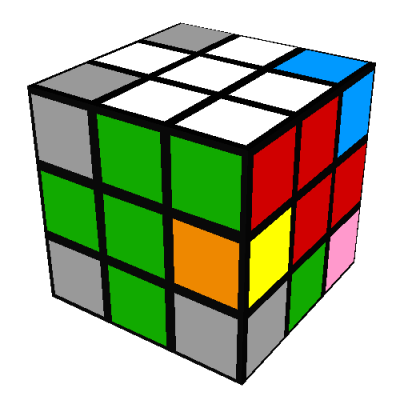
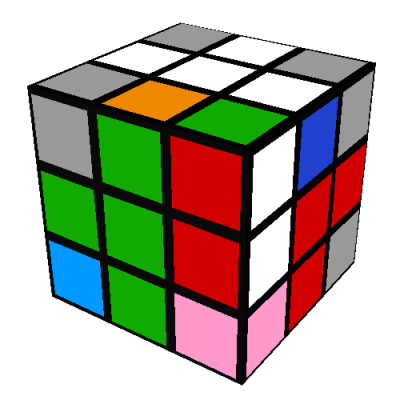
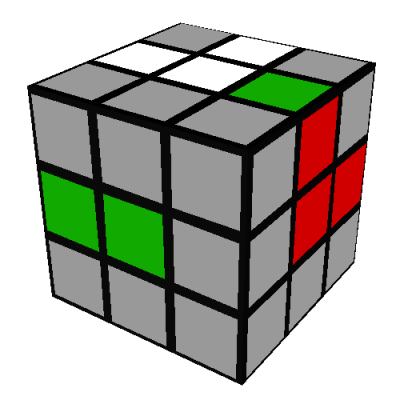
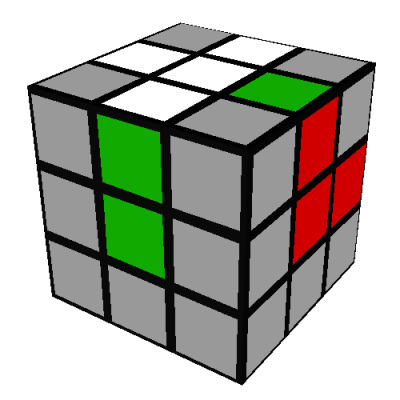
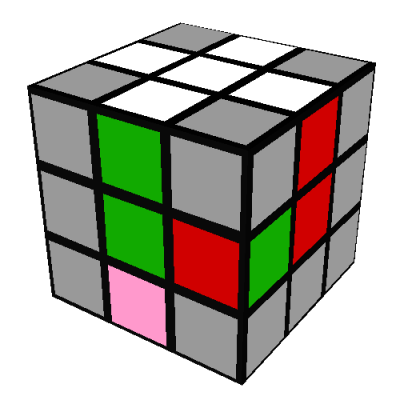
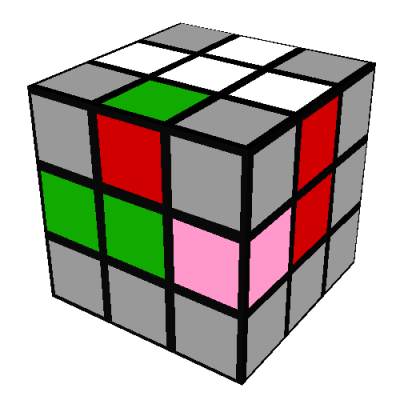
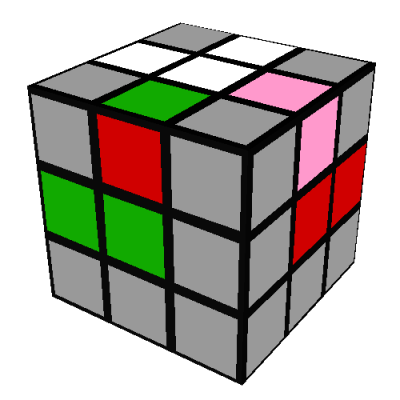
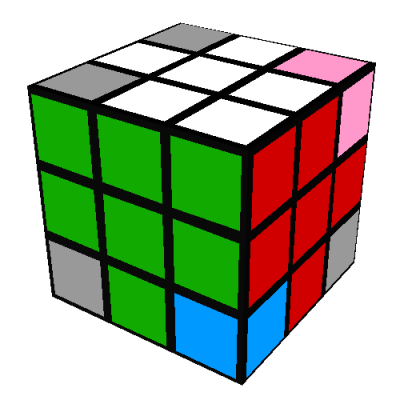
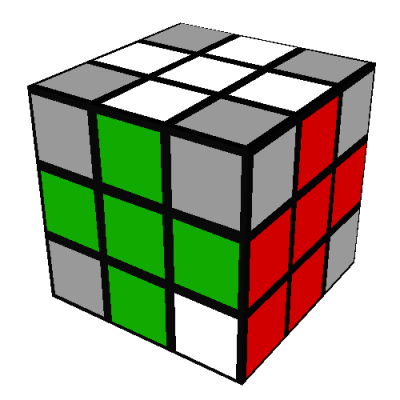
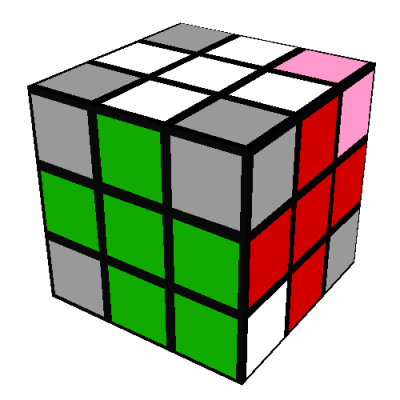
- Neither face of the green-red edge is on the D/yellow side of the cube. For example:
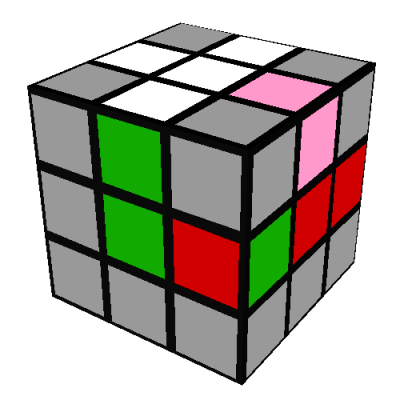
In this case, we will move an arbitrary (note 9) edge,
shown in pink, from the D/yellow side of the cube into the spot occupied by the green-red edge,
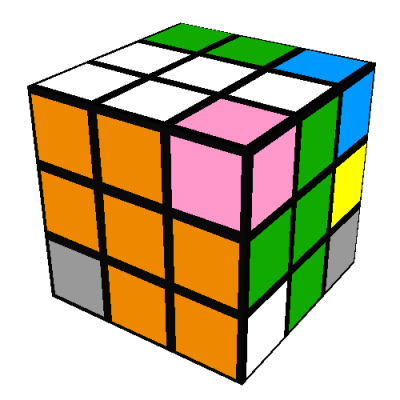
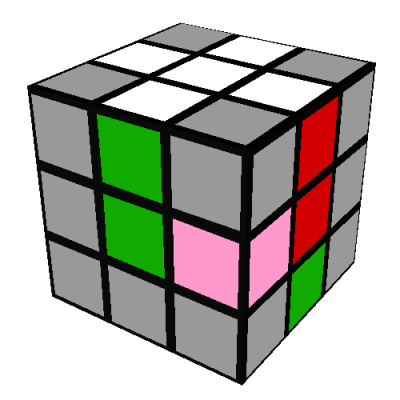
using the same F'RFR' sequence as above:
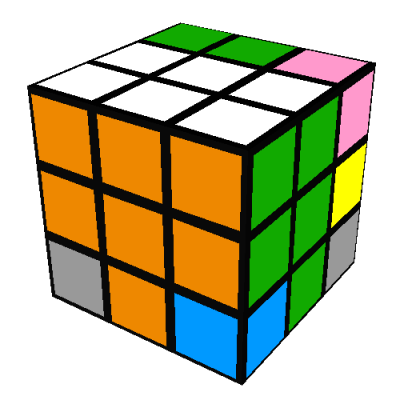
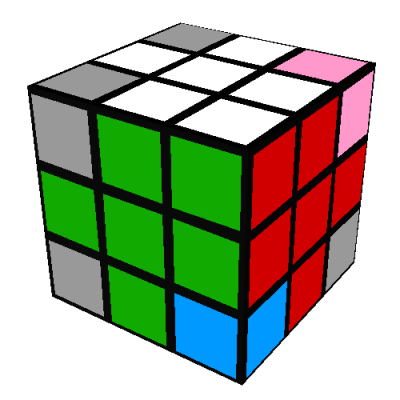
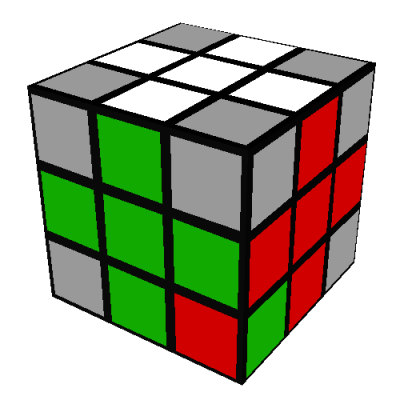
This will leave the green-red edge with one of its faces (the red one in our example) on the
D/yellow side of the cube, whereupon we can proceed as above.
- The green-red edge happens to be in the correct position and orientation already.
We got lucky, no need to do anything further with this edge.
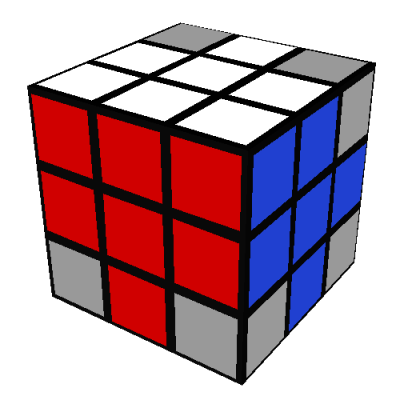
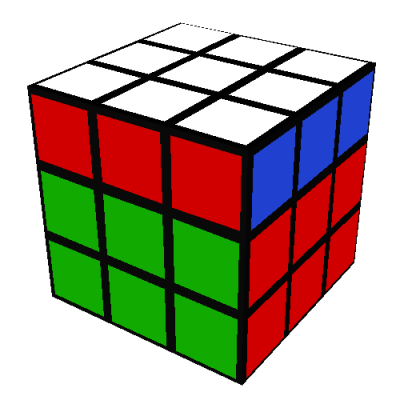
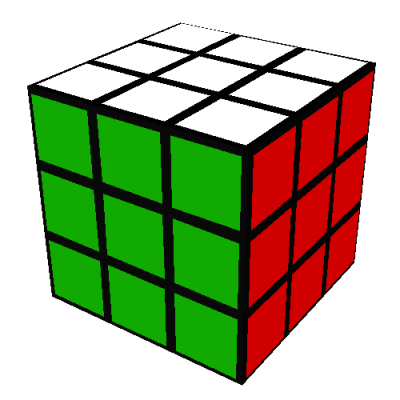
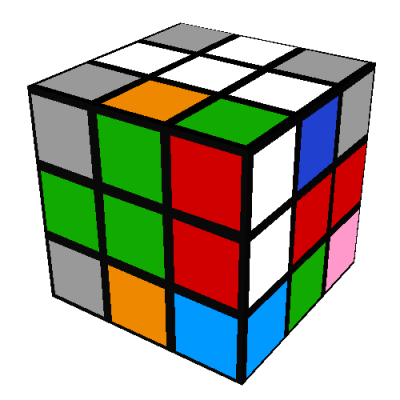
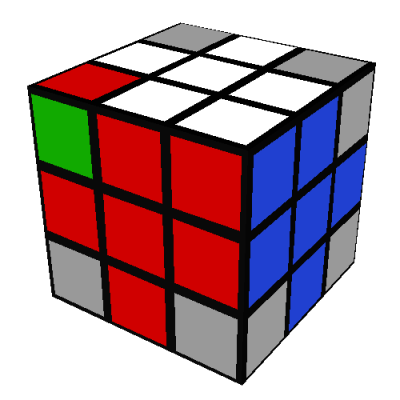
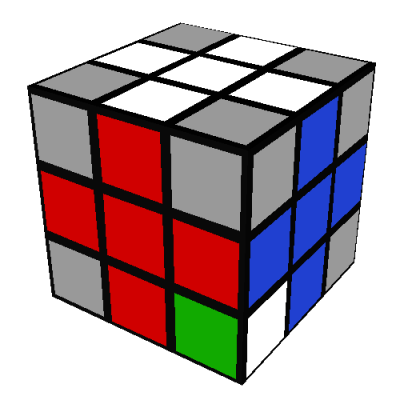
Repeat these steps for each of the three remaining middle edges (red-green, red-blue, and
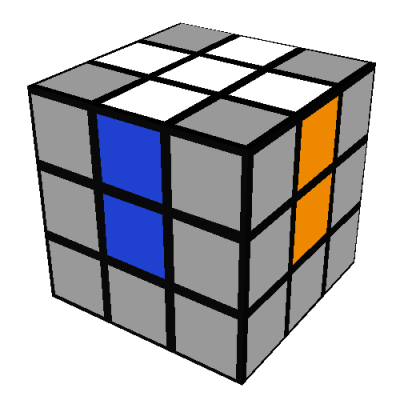
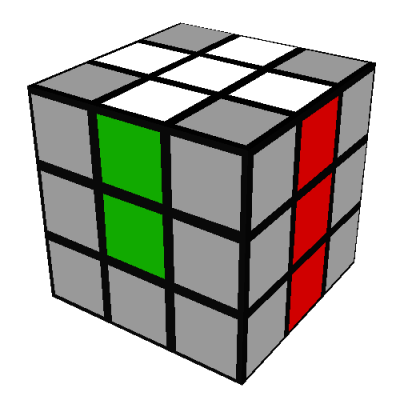
blue-orange). When you are finished, the front and back of the cube should look like this:
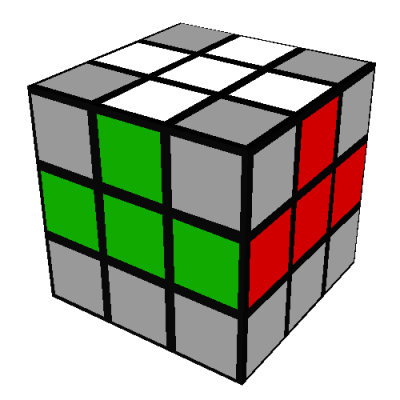
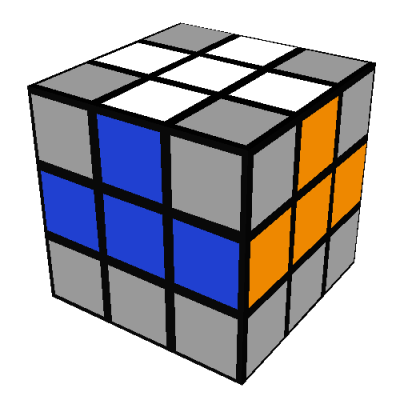
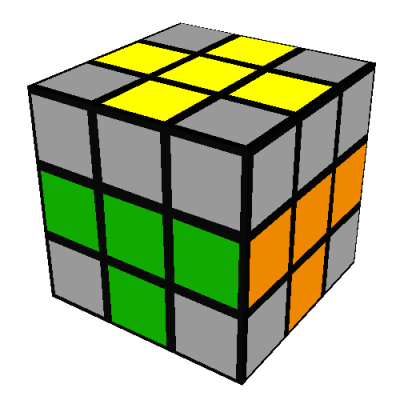
Bottom edge orientation
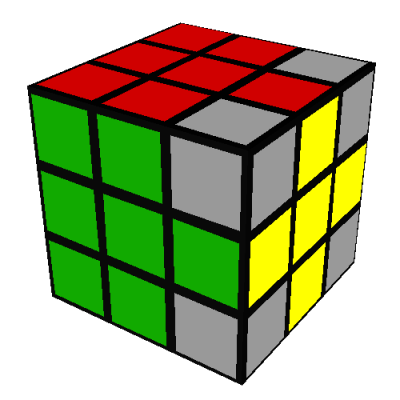
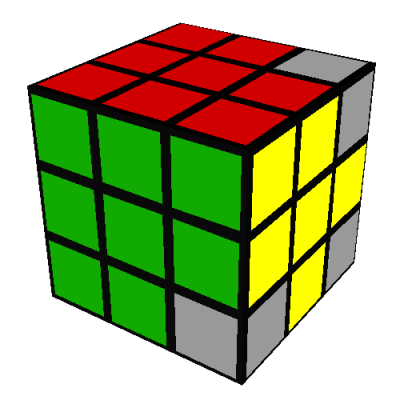
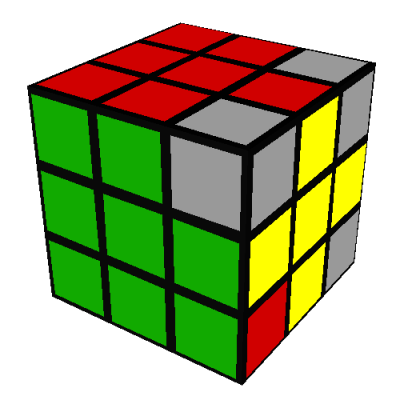
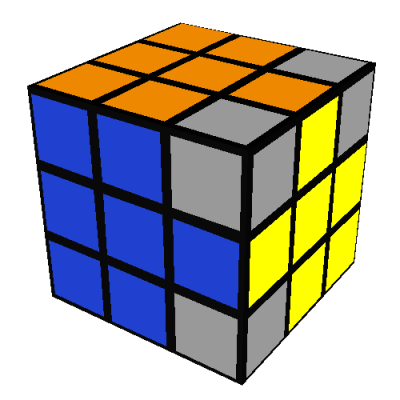
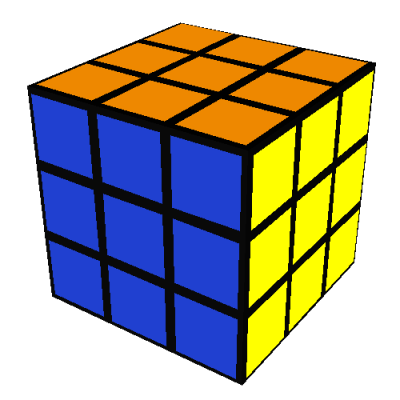
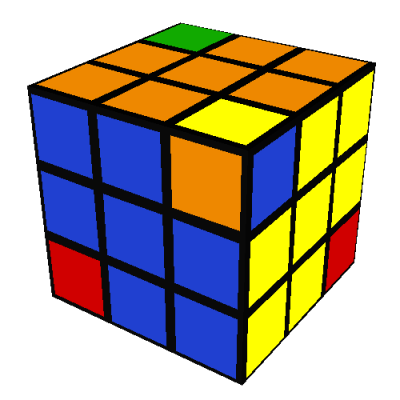
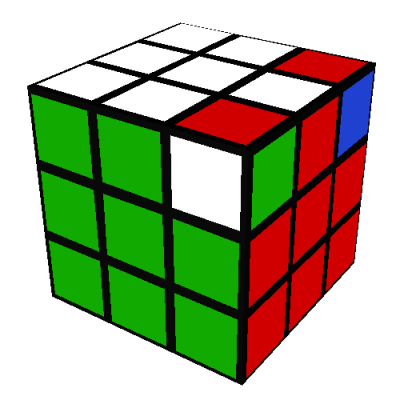
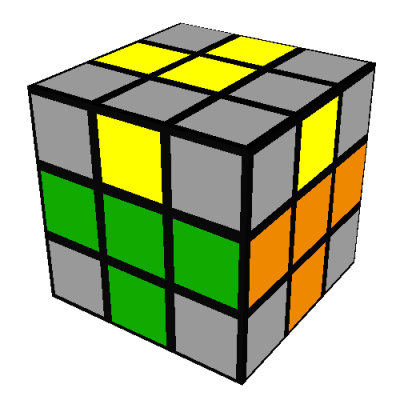
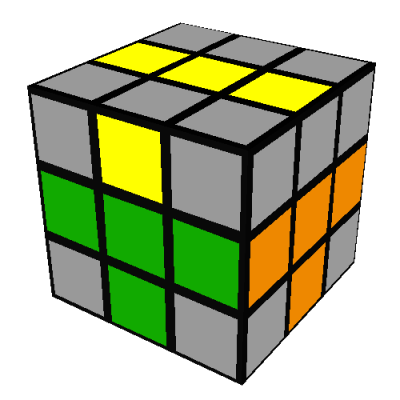
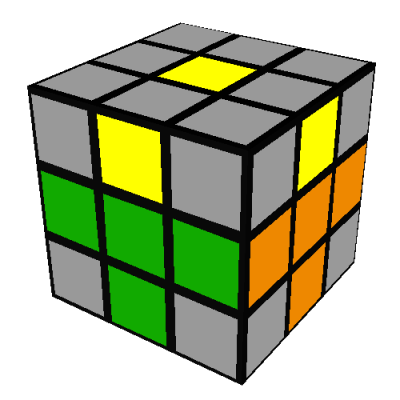
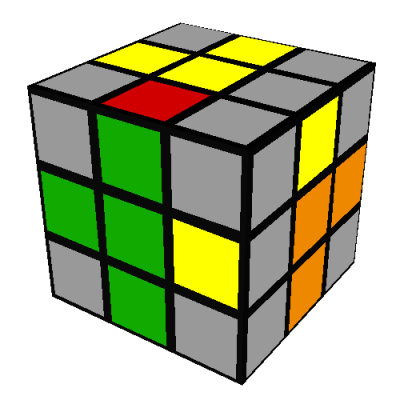
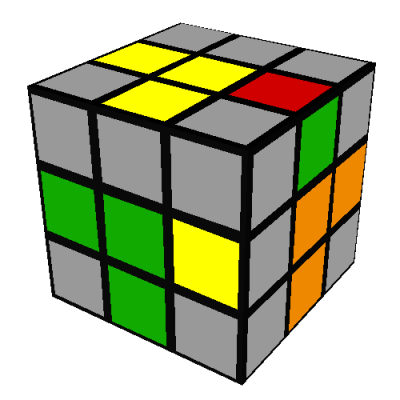
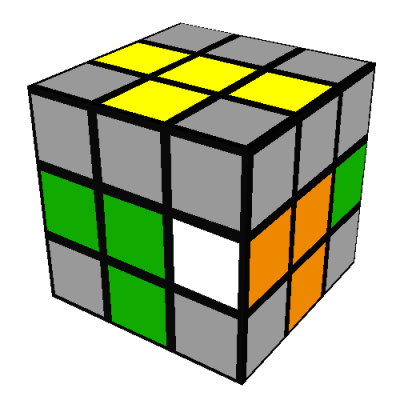
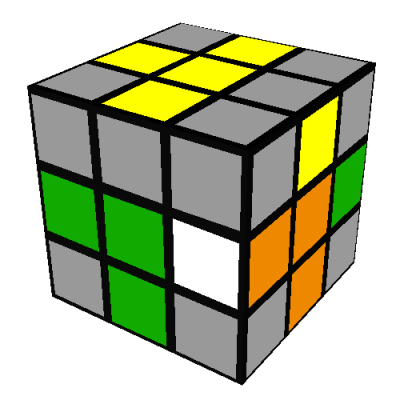
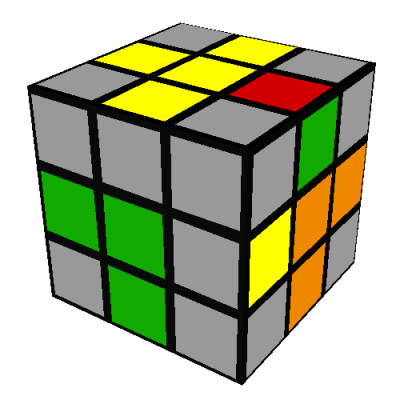
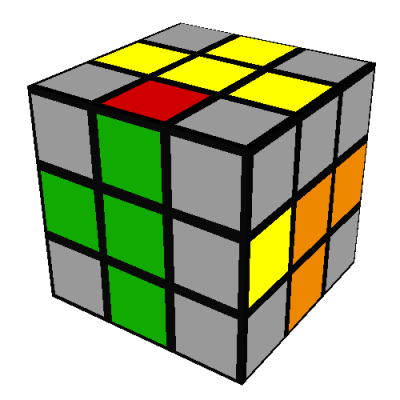
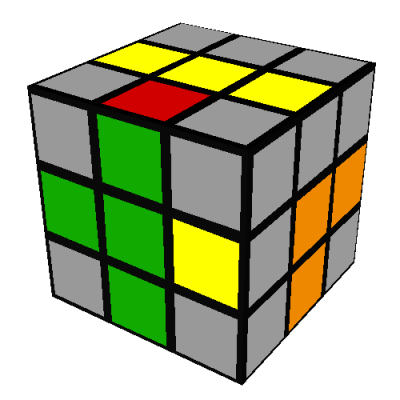
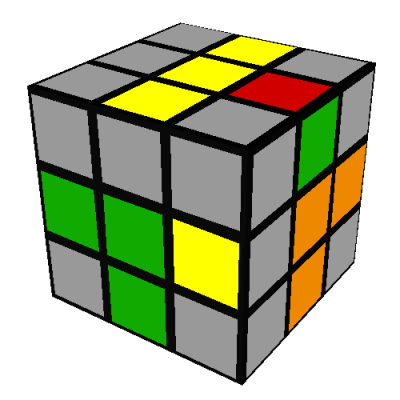
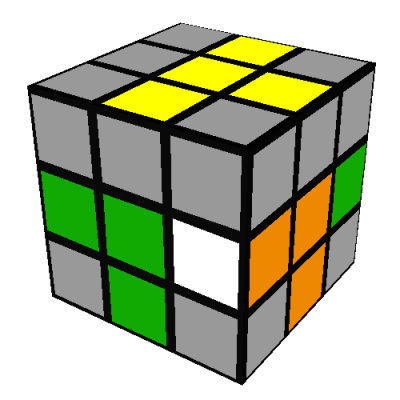
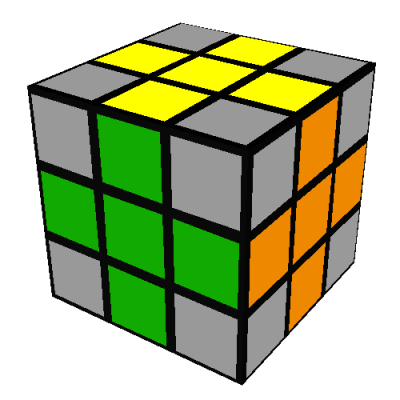
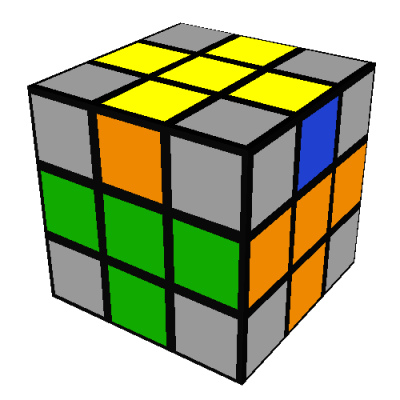
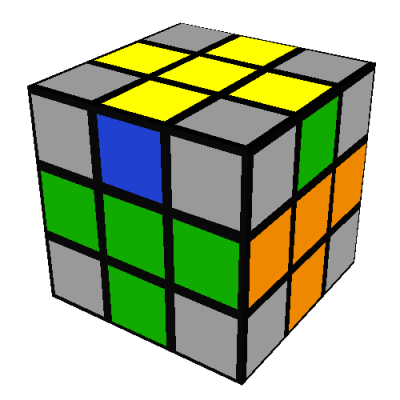
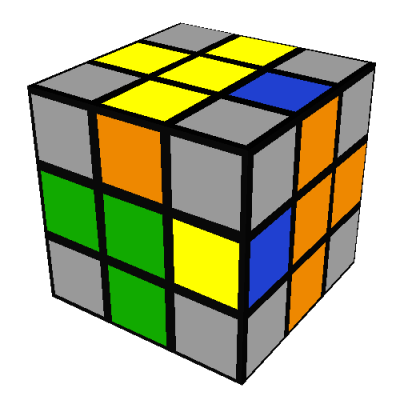
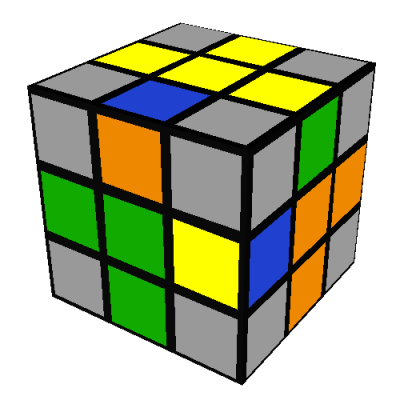
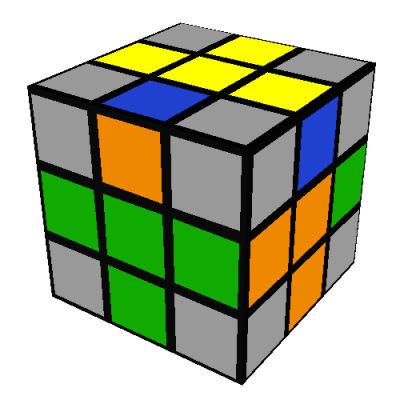
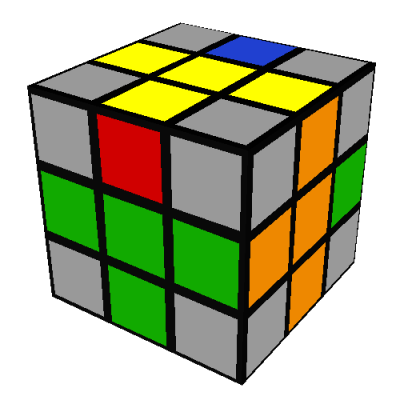
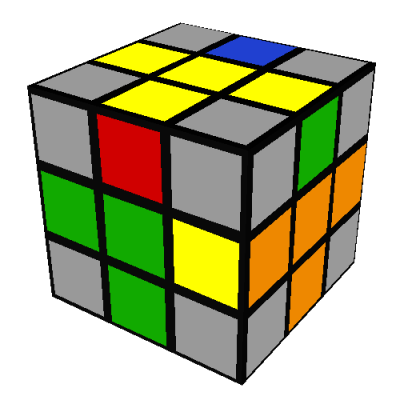
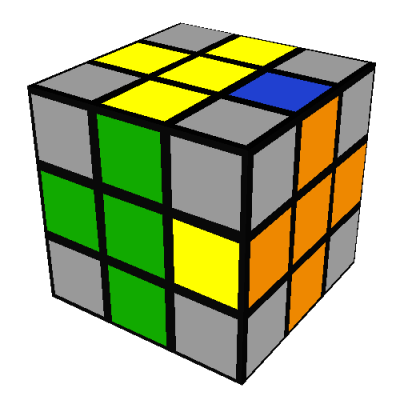
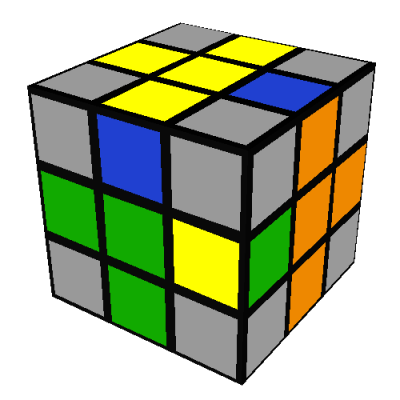
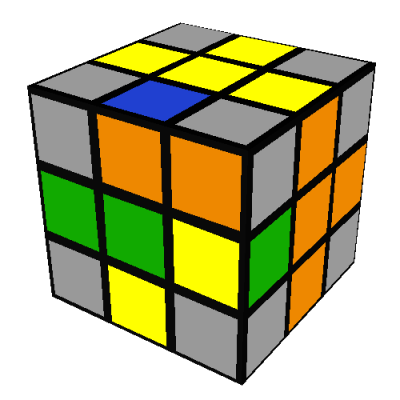
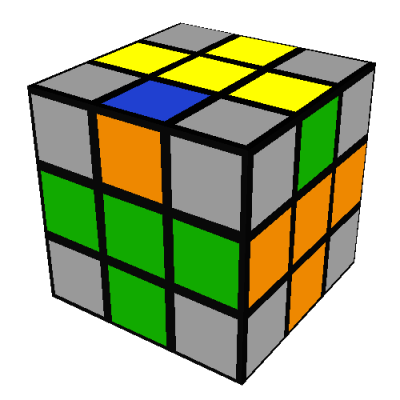
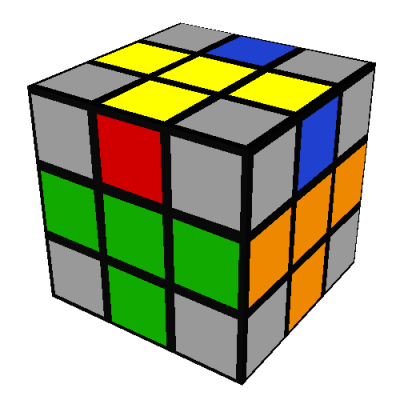
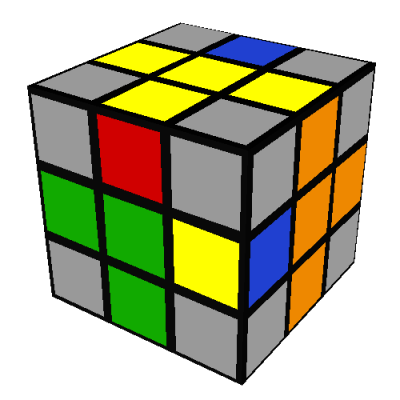
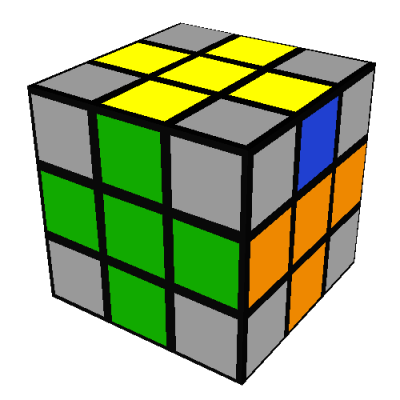
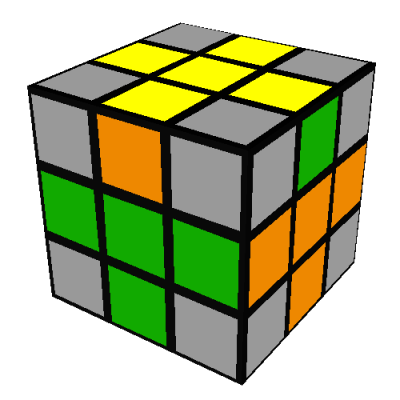
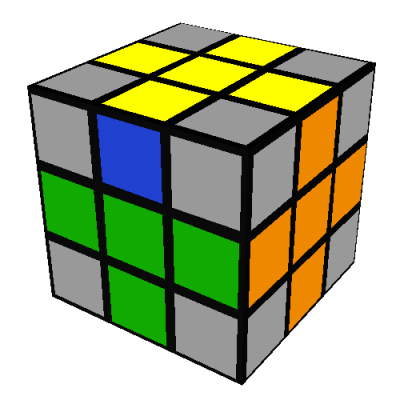
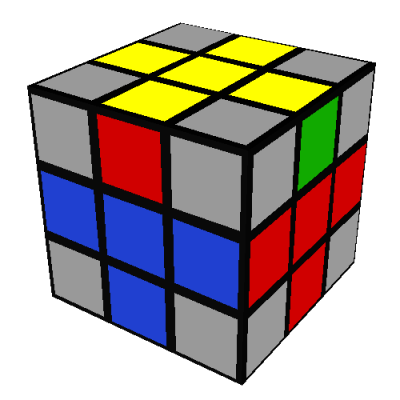
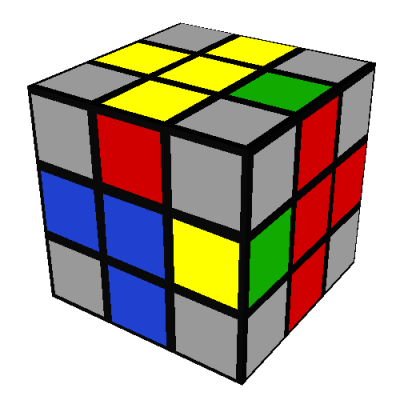
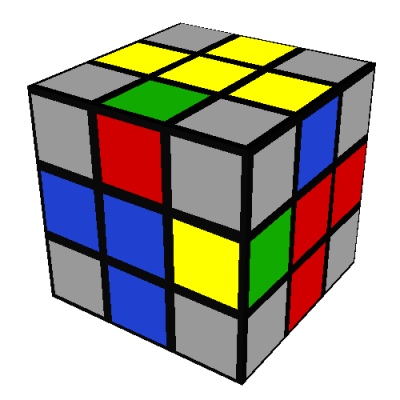
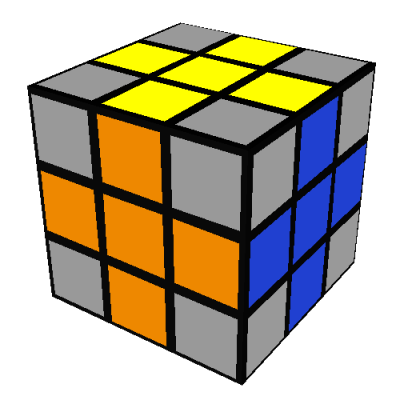
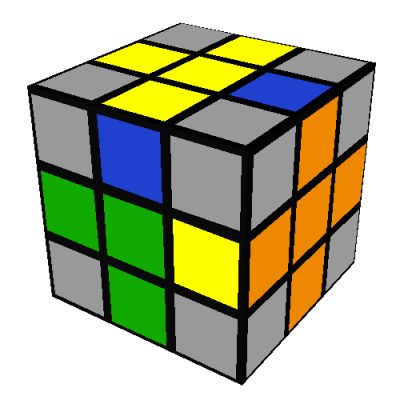
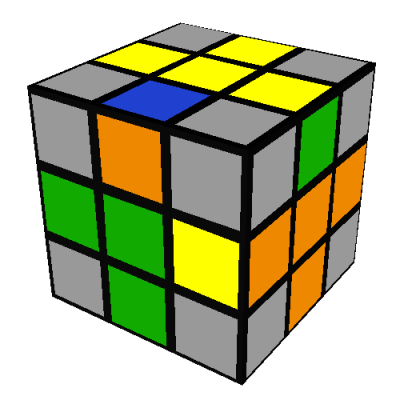
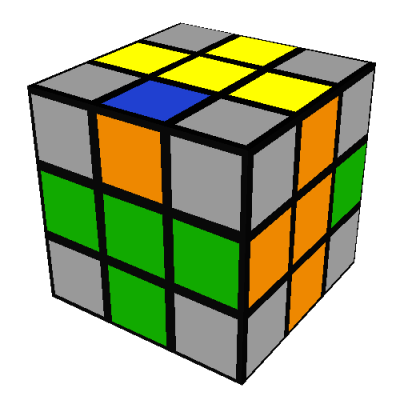
The next step is to get the four bottom edges in the correct yellow face down orientation. If we
flip the whole cube upside down, so that the D/yellow yellow side is upwards and the L/orange side
is to the right, the cube should (note 10) look like one
of these four images. If two yellow faces are present, you may need to spin the down (D) yellow
side to line up the yellow edges as shown.
If it looks like the image on the left then you got lucky; proceed to the next step.
If it looks like the second image, then you need to flip two of the edges without disturbing any
other edge on the cube. Imagine a sequence of turns, S, that flips one of the edges we are
interested in, while preserving the other three yellow edges. S is free to completely destroy all
the rest of our progress thus far -- it only needs to preserve the edges on the D/yellow side of
the cube. Then what you will do is execute SDS'D'. This will flip the one edge, totally mess
up the rest of the cube, substitute a different edge, and then undo the mess while flipping the
second edge back, and finally restore the D/yellow side to its original position.
The whole sequence needed is FD'LDL'DF', which looks like this:
The third image is very similar, except that you turn D twice in the middle: FD'LD2L'DF':
The fourth image is handled the same as the second image, but repeated twice for
each pair of edges that need to be flipped.
Bottom edge position
Turn the D/yellow side until the yellow-red edge is in the correct position and orientation.
There are six possibilities for how the remaining three yellow edges can end up:
- All four yellow edges are correct; proceed to the next step.
- All three edges are incorrect; there are two ways this can happen:
The first of these can be fixed using the following seven turn sequence, which rotates
three of the bottom edges in a cycle, without affecting the other nine edges: L'DLD2L'DL
The second of these can be transformed into the first using the same seven turn sequence: L'DLD2L'DL
(note 11)
Then proceed as above.
- Two edges are incorrect; there are three ways this can happen:
The first of these can be transformed into an analog of the first of the three-edges-different case
by doing L and then rotating the whole cube 180 degrees to put the R/red side on your right:
Then reposition the edges using the same seven turn sequence as before, just applied to different
faces: R'DRD2R'DR (note 12)
The second case is solved similarly, by doing L and then rotating the whole cube 90 degrees to put
the B/blue side on your right:
Then reposition the edges using the same seven turn sequence as before, just applied to different
faces: B'DBD2B'DB
The third case may be transformed into the first case by the same seven turn sequence: L'DLD2L'DL
after which you proceed as above.
Top corner positions
Until this point, we have not paid any attention to the corner pieces. After this point, we will
not pay any attention to the edge pieces: at the end of every following sequence all of the edges
will remain solved, giving a familiar cross pattern on every side of the cube
(note 13).
Now rotate the whole cube to its normal U/white up, R/red right, F/green front orientation. We will
begin by putting the white-green-red corner into its correct position (note 14). There are several possibilites to consider:
- The white-green-red corner is between the D/yellow, F/green, and R/red sides with its white
face on the R/red side:
Do the following eight turn sequence, which cycles the DFR, UFR (shown in pink), and UBR (shown in
cyan) corners in a cycle: R'D'RUR'DRU'
Notice that this sequence has modified only three pieces: the entire rest of the cube (centers,
edges, other corners) is preserved (note 15). This
sequence will be used in one form or another to position all the remaining corners
(note 16).
- The white-green-red corner is between the D/yellow, F/green, and R/red sides with its white
face on the F/green or D/yellow sides:
Do the same sequence as above; this will place the white-green-red corner in the correct location, but in the incorrect orientation. Don't worry about that for now, we'll correct it later (note17).
- The white-green-red corner is located in one of the other D/yellow side positions, for
example:
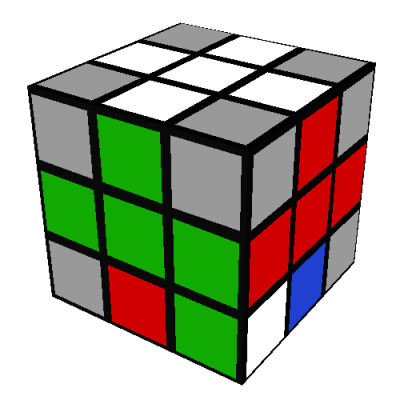
Here we do D' to bring the white-green-red corner into the same position as above:
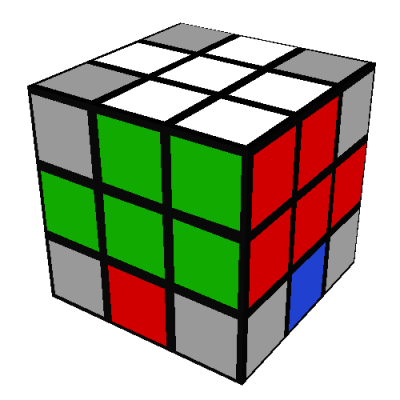
Then do R'D'RUR'DRU' as above, giving:
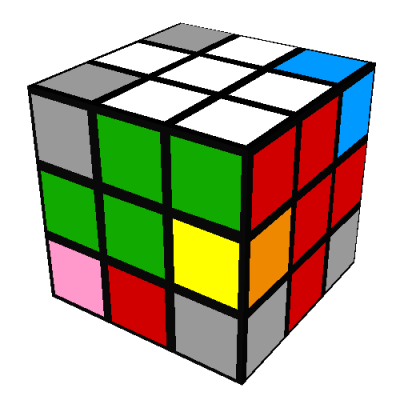
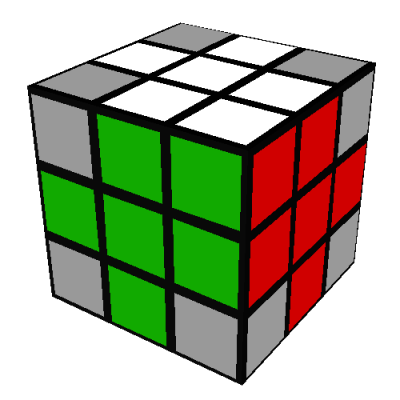
Lastly, do a D to "undo" the D' we did originally and restore all the edges to their correct locations:
- The white-green-red corner is between the U/white, F/green, and R/red sides, in any orientation. You got lucky; correct the orientation, if necessary, in the last step below. You can proceed to the next white corner.
- The white-green-red corner is somewhere else on the U/white side. You got unlucky, but
recall what happened to the pink and cyan corners above. Suppose that the white-green-red corner is
where the cyan corner was in our previous example:
We can do our same old R'D'RUR'DRU' to push the white-green-red corner down to the DFR corner where
we'd like it to be:
and then do another R'D'RUR'DRU' to get it where we want it:
If the white-green-red corner is not where the cyan corner was, just turn U until it is, do the pair
of R'D'RUR'DRU' sequences, and then turn U back so that the edges are correct again.
Now rotate the cube 90 degrees so that the B/blue face is to the right:

You can use the exact same sequence (transposed to B'D'BUB'DBU' to reflect that we're holding the
cube in a different position) to put the white-red-blue corner in its correct location, giving (note 18):
Then rotate the cube another 90 degrees so that the L/orange face is to the right:
The same sequence (transposed to L'D'LUL'DLU') can be used to put the white-blue-orange corner in its
correct location, giving (note 19):
Then rotate a final 90 degrees, placing the F/green side one the right, to position the
white-orange-green corner correctly:
We can't just do a simple F'D'FUF'DFU', however, as that will move the already correct
white-green-red corner that we started with. Suppose we have:
Then before we use our F'D'FUF'DFU', we'll do an R, giving:
Then we do the usual F'D'FUF'DFU', which gives:
Then we undo our R with an R', giving (note 20):
Bottom corner positions
Rotate the whole cube so that the R/red face is up and the D/yellow face is to the right:
We'll position the red-green-yellow corner first. There are only four places it can be
The first case is easy -- it's in the correct position already, so proceed to the next step. The
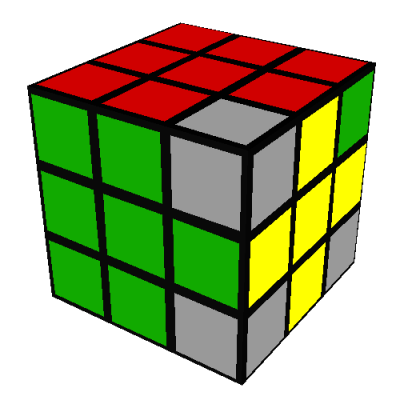
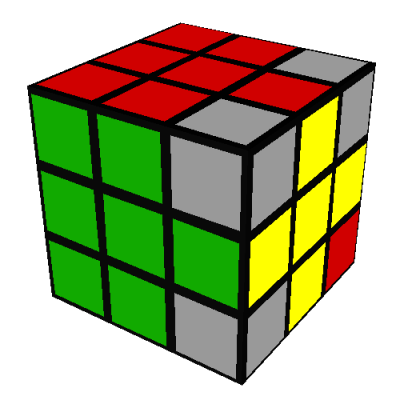
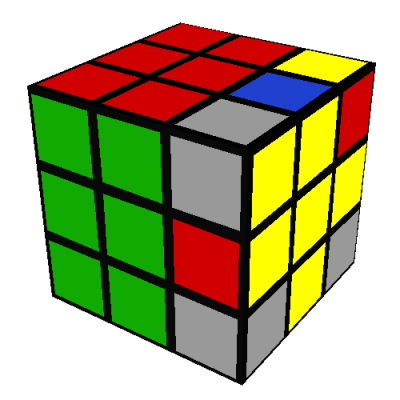
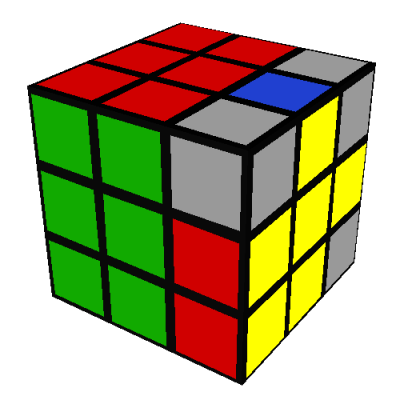
second and third cases can be solved by one or two repititions of our same three corner cycle,
transposed to D'L'DRD'LDR' (note 21).
The fourth case is a little tricky. First do D':
Then do D'L'DRD'LDR' as usual:
Then do D to put the edges back in place (note 22):
Now rotate the whole cube so that the L/orange face is up and the D/yellow face is to the right:
Now we simply repeat the same sequence (transposed to D'RDLD'RDL') zero, one, or two times
(note 23) to get the remaining three corners in their
correct locations, giving:
If we're very lucky, all the corners will be twisted correctly, and the cube is now solved!
But it's more likely that you'll have something like:
in which case you should proceed to the seventh and final step.
Corner orientation
Just as we used a single sequence (R'D'RUR'DRU' and it's various transpositions) to position all
eight corners correctly, we will use a single sequence to twist all eight corners correctly. This
step is quite similar in spirit to bottom edge orientation above. Suppose that
the cube looks like:
We want to twist the white-green-red corner clockwise, and twist the white-red-blue corner
counter-clockwise. Imagine a sequence of turns, S, that twists the white-green-red corner
clockwise, while preserving the entire remainder of the white side of the cube. S is free to
completely destroy all the rest of our progress thus far -- it only needs to preserve the U/white
side of the cube. Then what you will do is execute SUS'U'. This will twist the white-green-red
corner, substitute the white-red-blue corner for it, and then untwist the white-red-blue corner.
S itself is rather long at seven turns: R'DRD'RDR, making the whole sequence sixteen turns long:
R'DRD'R'DRUR'D'RDR'D'RU'
Whew! That's S, now we do the key rotation of U to swing the white-red-blue corner into position:
Then we do the seven turns of S': R'D'RDR'D'R:
And finally, we do U' to put the edges back into place:
We then repeat this sixteen turn sequence as many times as necessary, holding the cube in different
orientations to select different pairs of corners, until all the corners are correctly twisted
(note 24). There are several straightforward
simplifications possible, for example you can twist the white-green-red corner clockwise and twist
the white-blue-orange corner counter-clockwise by using SU2S'U2 instead of SUS'U. These are handy
but not strictly necessary shortcuts, and are left as an exercise for the reader.
Center rotation
This step is only necessary when you are using a cube where the orientation of the centers is
visible, for example when each side of the cube is a photograph instead of a single color.
The principle is the same as for corners. We need a sequence of turns, S, that has some interesting
effect on one or more center pieces, but does not have any effect on any of the edge or
corner pieces, which we have already solved by this point. There are many such sequences, I will
list two handy ones here. (No illustrations are provided, because the image generator I use only
allows solid colors.)
Option 1: Rotate the center of the U face counter 90 degrees counter-clockwise, rotate the center of
the L face 90 degrees clockwise, and leave everything else unchanged. (This is sufficient to solve
all the centers, but can be tedious.)
Do: RL'F'BU'DLUD'FB'R'LU'
Note that this is easier to execute mechanically if you think of it as moving the center
slices of the cube, allowing the centers to change orientation relative to your hands throughout
the sequence. So the first two turns are really "move the center vertical slice towards me by
90 degrees" and so forth.
Option 2: Rotate the center of the U face 180 degrees and leave everything else unchanged.
Do: URLUUR'L'URLUUR'L'
This option isn't ever strictly necessary, but is easier and faster than using option 1 twice to
achieve the same effect.
Note that as with edge flipping and corner rotation, center rotation has parity. If you have solved
the cube entirely except for a single center piece that is rotated by 90 degrees, then the
cube has been incorrectly assembled and cannot be solved without disassembling it. This is not
always obvious: consider that some cubes may contain some faces with solid colors and others with
photographs -- you can always solve these even if they were incorrectly assembled, since you can use
Option 1 above to fix the photographic centers while "hiding" any leftover parity violation in
one of the non-photographic centers.
Enjoy! Please feel free to send corrections or comments to adam.greenblatt@gmail.com, thanks!
Thanks, also, to the fine folks at ruwix.com, referenced above. I
used their lovely
image generator to produce all of the .png files in this document.
Notes
1: By Saturday afternoon, I had figured out that the only way I was going to
get anywhere was to "cheat" and disassemble the cube and reassemble it in the solved position. It
is much easier to study the effect of a potentially useful sequence of moves if you perform
them starting from the solved position. By Sunday night, I had a working algorithm that
was breathtakingly slow -- it took hundreds of turns and ten or fifteen minutes. Mercifully
the details of that algorithm are lost to posterity. (back)
2: It's hard to overstate just how popular cubes were in the early 1980s.
Their popularity has waxed and waned since, but back then they were so popular that being able to
solve one was almost enough for a hopeless geek such as myself to be considered socially
acceptable, if not actually popular. (back)
3: My best times were just under 20 seconds, with 25 second times being
typical. That's pathetically slow by today's standards, but pretty decent for the early 1980s. But
with over a hundred separate sequences to memorize, it was far more complex than that presented
above. (back)
4: I don't mean to imply that I'm not still a twit, but I like to
delude myself into thinking that I've mellowed a little with age (back)
5: No doubt because I no longer spend quite so much time cubing. (back)
6: It is simpler than anything I had seen published elsewhere, though I have
not made a comprehensive survey of the literature to see if that is still the case. In exchange for
simplicity, you must sacrifice a certain amount of speed -- it typically takes me 60 or 70 seconds
to solve a cube using this technique. Oh, how the mighty have fallen. (back)
7: The 27th sub-cube is hidden in the center, with no faces at all.
I highly recommend disassembling the cube to ponder how it works mechanically; it is a
beautiful mechanism. (back)
8: I learned on the original Japanese color scheme; to this day I still feel betrayed when I see a blue-white edge. (back)
9: In many but not all instances, you can avoid this situation by solving
the middle edges in a different order. For example, if the red-green edge had ended up between the
blue and orange centers, you could solve the blue-orange edge first, which would perforce push the
red-green edge back to D/yellow side of the cube where it can be handled more efficiently.
It is only when the red-green edge is in its correct location and flipped, as shown, that you must
resort to using a temporary edge like this. (back)
10: If either one or three of the four bottom edges have their yellow faces
down, then you cannot solve the cube: it has been incorrectly assembled. The mathematically
inclined among you may enjoy proving that this is the case. The rest of you may take it on faith
that the total number of flipped edges must be even. Intentionally "breaking" a cube by
disassembling it just enough to flip a single edge or twist a single corner was a common practical
joke. On a well-worn cube, you can do this one handed quite easily. There are actually twelve
separate "universes" you can assemble a cube into (two for edge parity, times three for corner
twist, times two for corner exchange), only one of which contains the "solved" cube. So if you
assemble a cube at random, your odds of it being solvable are only 1 in 12.
(back)
11: This sequence, if repeated three times, brings the edges back to where
they were to begin with -- it is a "three cycle" of edges. So you could use the more efficient
inverse sequence L'D'LD2L'D'L instead. (back)
12: Note that R'DRD2R'DR and L'DLD2L'DL are fundamentally the same sequence in terms of muscle memory -- you are just applying the sequence while holding the cube in a different orientation. (back)
13: Conversely, if at the end of any sequence you do not have a
cross on all sides, you've probably made a mistake. Go back and fix the edges before proceeding.
(back)
14: You may defer any concern for the orientation if you prefer, and take
care of the orientation of all of the corners in the final step. But I find it is usually faster to
place the white corners in their correct orientation at the same time as you are putting them in
their correct positions. (back)
15: Try it on a solved cube! Then repeat it twice more to get back to the
solved state. (back)
16: You could use it to set both the position and orientation, but
having a dedicated orientation sequence, as we do below, is usually more
convenient. (back)
17: If the white face is on the F/green side, you can do the analagous
"mirror-image" eight turn sequence, which cycles the DFR, UFR (shown in pink) and UBR (shown in
cyan) corners in a cycle: FDF'UFD'F'U'
There's a similar sequence you can do if the white face is on the D/yellow side, which is left as an
exercise for the reader. These sequences are unnecessary, but will save you time getting the corner
orientations fixed in the final step. (back)
18: The white-red-green and white-red-blue corners may not be in the correct orientation, for example you may have one of these:
That's OK, we'll fix the orientations in the final step. (back)
19: As before, the orientations on the white corners may not be
correct. (back)
20: As before, any or all of these white corners may have incorrect
orientations, here's an example showing all four sides:
(back)
21: These sequences are all the same as far as muscle memory goes, they're
only written differently because we're holding the cube in a different
orientation. (back)
22: As before, the red-green-yellow corner may not be twisted correctly, for example:
(back)
23: If this does not put all the corners in their correct positions,
then you cannot solve the cube: it has been incorrectly assembled. See note
10. (back)
24: If you end up with one twisted corner, then you cannot solve the
cube: it has been incorrectly assembled. See note
10. (back)
 This four turn sequence has moved the green-red edge into its correct position and orientation without disturbing any of the other white or middle edges.
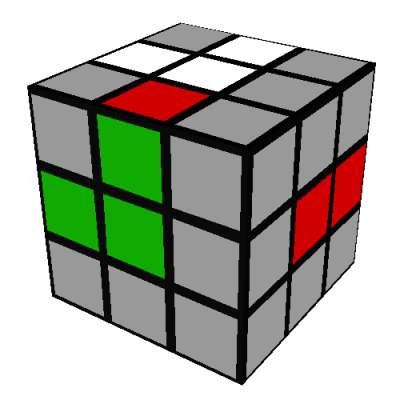
 This four turn sequence puts the green-red edge into its correct position and orientation without disturbing any of the other white or middle edges.

 This will leave the green-red edge with one of its faces (the red one in our example) on the D/yellow side of the cube, whereupon we can proceed as above.








 The second of these can be transformed into the first using the same seven turn sequence: L'DLD2L'DL (note 11)


 Then proceed as above.


 Then reposition the edges using the same seven turn sequence as before, just applied to different faces: R'DRD2R'DR (note 12)

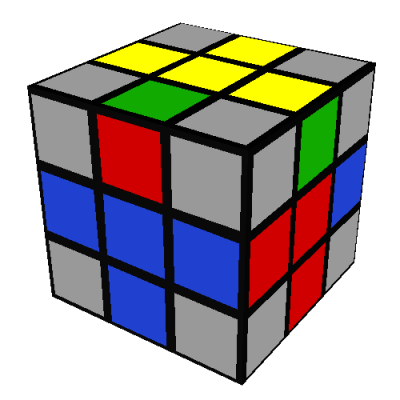 The second case is solved similarly, by doing L and then rotating the whole cube 90 degrees to put the B/blue side on your right:
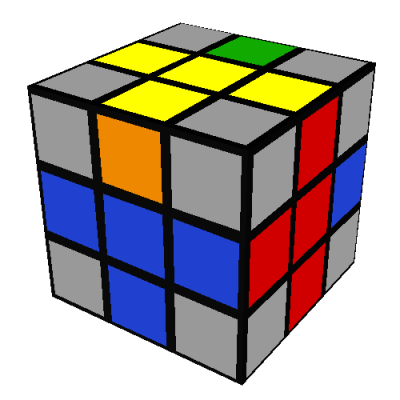
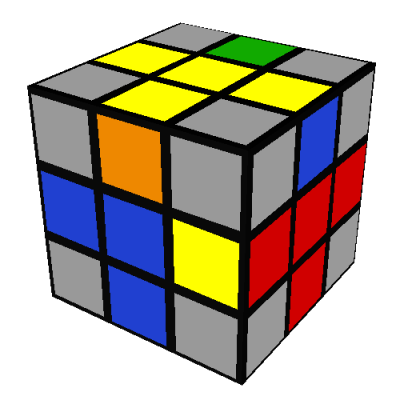
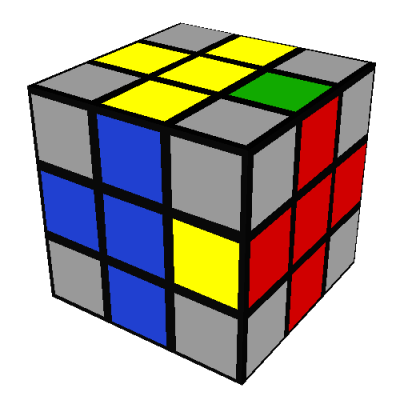
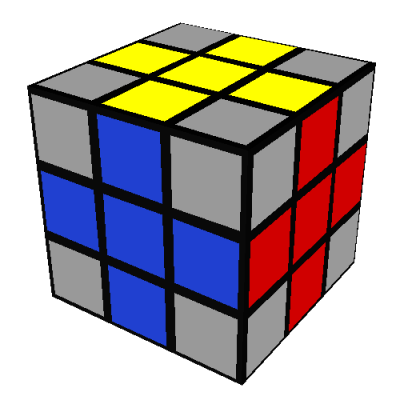 Then reposition the edges using the same seven turn sequence as before, just applied to different faces: B'DBD2B'DB
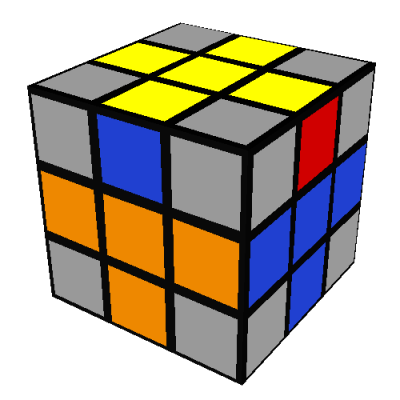

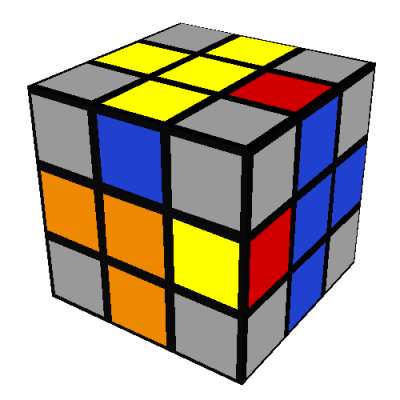
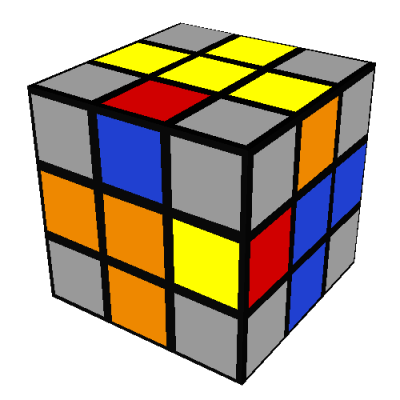
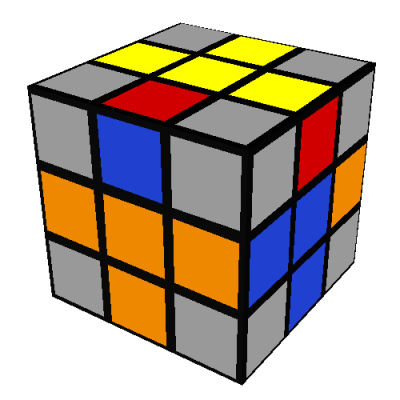 The third case may be transformed into the first case by the same seven turn sequence: L'DLD2L'DL
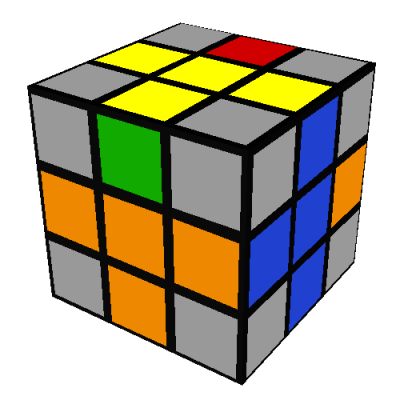
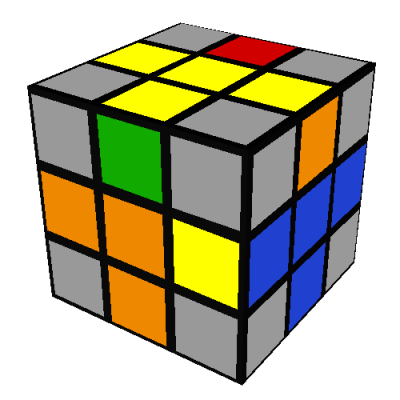
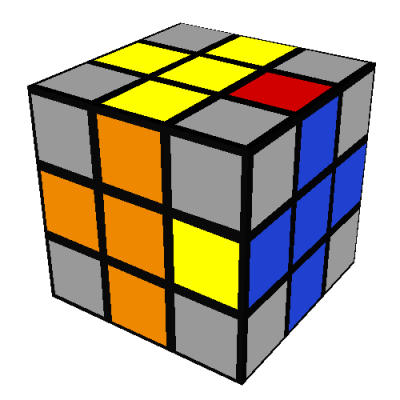

 after which you proceed as above.
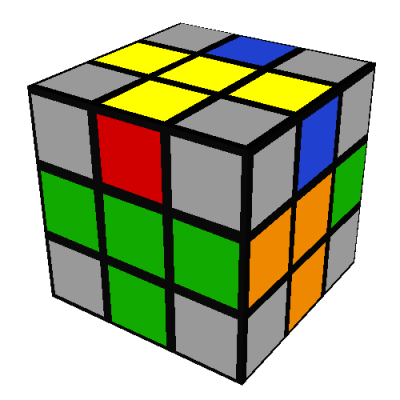
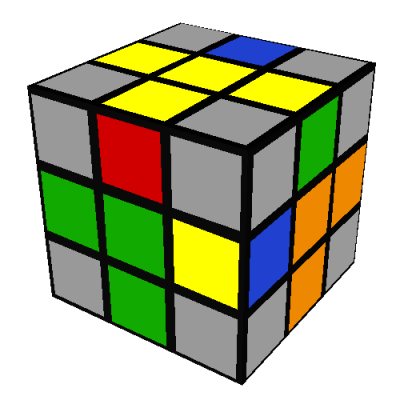
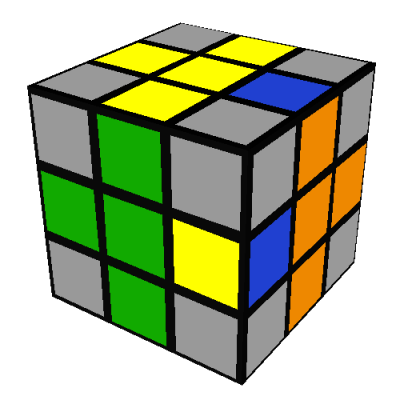

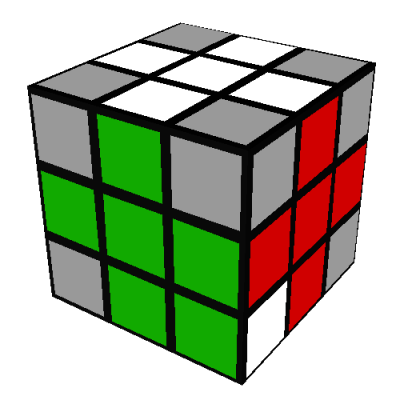
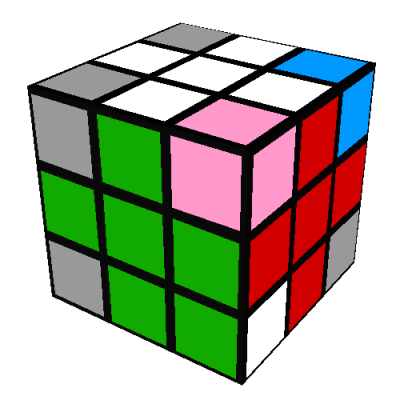
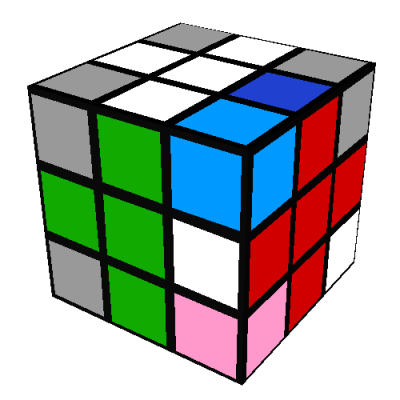
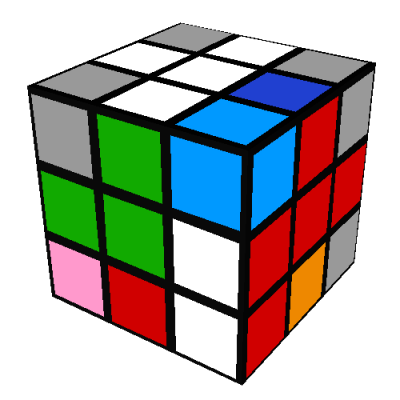
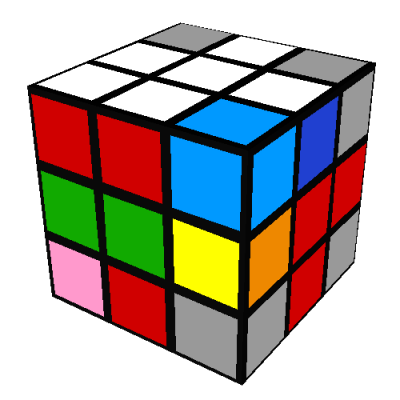
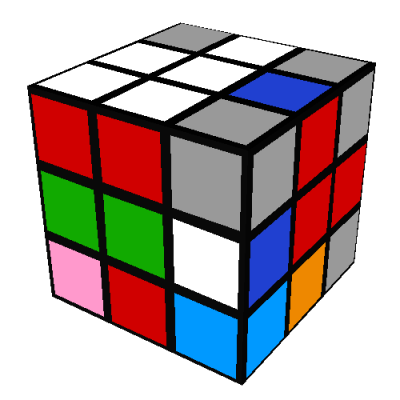 Notice that this sequence has modified only three pieces: the entire rest of the cube (centers, edges, other corners) is preserved (note 15). This sequence will be used in one form or another to position all the remaining corners (note 16).
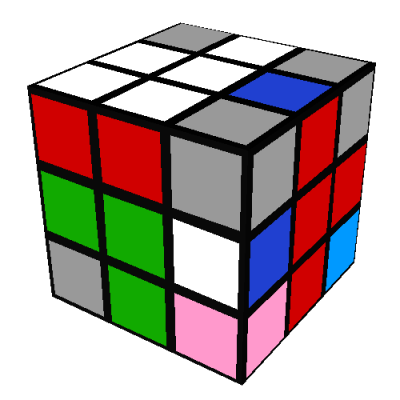
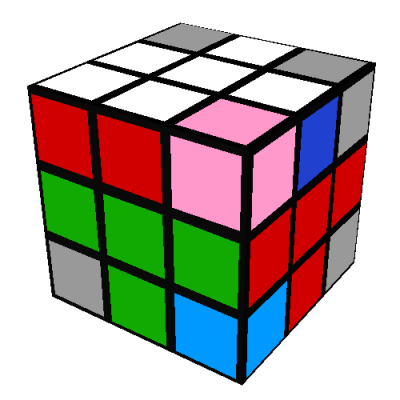
 Then do R'D'RUR'DRU' as above, giving:
 Lastly, do a D to "undo" the D' we did originally and restore all the edges to their correct locations:
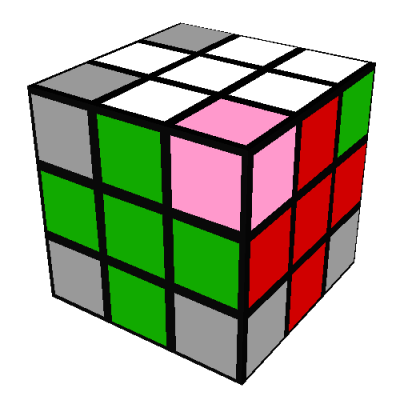 and then do another R'D'RUR'DRU' to get it where we want it:
 If the white-green-red corner is not where the cyan corner was, just turn U until it is, do the pair of R'D'RUR'DRU' sequences, and then turn U back so that the edges are correct again.